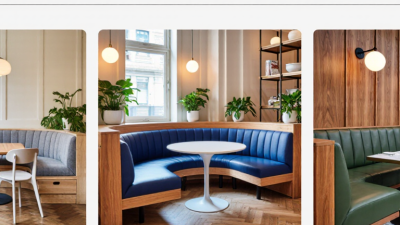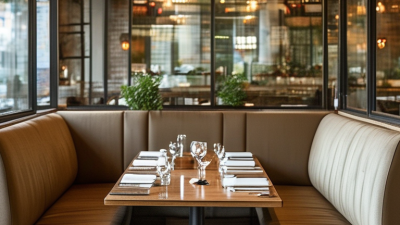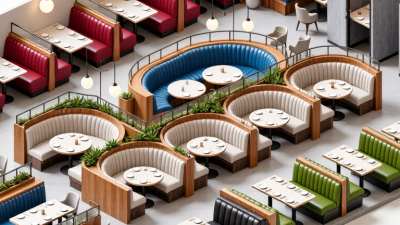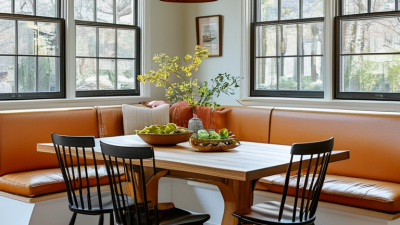
Choosing the right Banquette Seating means balancing comfort, circulation, durability, and the character of the room. A beautiful booth can still disappoint if diners cannot slide in easily or servers must squeeze past its edge. Start with the space itself: measure the wall, table height, aisle width, and nearby doors. Then consider who will use the seating. Families may need wipe-clean upholstery, while a small café might value compact dimensions and hard-wearing fabric. Small details matter. Seat depth, back angle, and table clearance affect comfort more than appearance alone.
Architect Frank Lloyd Wright offered a useful design principle: “Form follows function—that has been misunderstood. Form and function should be one, joined in a spiritual union.” His words were not specifically about banquettes, but they fit the decision well: the seating should look right and work in daily service. For example, a 48-inch table may need a different seat depth and aisle allowance than a narrow breakfast nook. Ask suppliers for dimensions, upholstery specifications, and cleaning guidance, rather than choosing from a photograph. If possible, test a sample seat. Sit down. Stay a while. One honest caution: measurements on a plan can feel generous until a chair, bag, or passing server enters the scene. This guide will help you compare layouts, materials, comfort, and maintenance before committing to Banquette Seating.
Before choosing banquette seating, measure the room at floor level and sketch its fixed features. Include doors, windows, radiators, outlets, and the path people use to move through the space. A tape measure and a simple floor plan can prevent costly guesswork. Leave enough clearance for chairs or nearby doors to open without bumping into the bench. Check the tightest point, not just the room’s widest area. Small details matter.
Think about how the layout will work during everyday use. A straight bench suits a narrow wall, while an L-shaped arrangement can use a corner, but may make access harder at the inner seat. Mark the proposed footprint with painter’s tape, then walk around it and pull out a chair. It feels different in practice. Measure the table, too: diners need comfortable legroom, and the bench should not push them too far from the surface. If the room has an unusual alcove, recheck measurements at several heights; walls are not always perfectly square. I have found that an extra measurement is less troublesome than discovering the table blocks a walkway.
Start by identifying who will use the banquette and how long they usually sit. A breakfast nook used for quick meals has different needs from a dining area used for homework or long dinners. Count regular users, then allow space for occasional guests without blocking the walkway. A floor plan may look generous on paper yet feel cramped once chairs, bags, and coats appear. That detail is easy to miss.
Measure the table height, available wall length, and clearance for knees before selecting a seat. Seat height should let people rest their feet comfortably, while adequate depth supports the thighs without pressing behind the knees. If possible, mark the proposed seat edges on the floor with painter’s tape. Test it in person. Sit down, slide in, and check whether people can enter and leave without shifting the table. Small details matter.
Comfort also depends on the cushion, back angle, and the people sharing the space. Firm cushions often support longer meals better than very soft ones, but comfort varies with body size and mobility. Consider wipeable fabric for frequent spills, and check that seams will not rub against the wall. One measurement may still be off; recheck it after accounting for baseboards and cushion thickness. Keep the seat easy to clean and simple to reach.
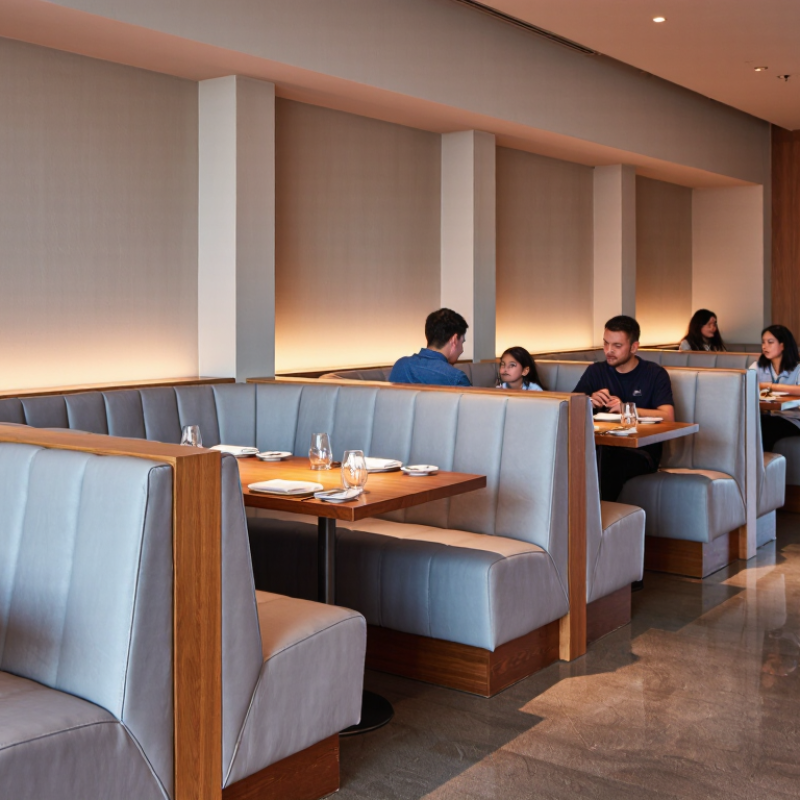
A straight banquette suits a narrow wall and keeps circulation simple, but it offers fewer seating options. An L-shape uses a corner efficiently and creates a snug dining nook. Choose it only when people can slide in and out without disturbing everyone else. A U-shape can seat more diners, yet it needs generous floor space and may make the table feel enclosed. Small rooms need restraint. Mark the proposed footprint on the floor with painter’s tape; a chair or table can reveal problems a neat sketch misses.
Use the National Kitchen & Bath Association’s Kitchen Planning Guidelines as a practical sizing reference: allow about 24 inches of seating width per diner. Then check table height, seat depth, and legroom together, not as separate numbers. A deep seat may look inviting but leave shorter diners leaning forward. Measure the aisle with the table in place, too; occupied seats need room behind them. Measure twice. A tight corner can still feel awkward, and that is worth reconsidering. For a family nook, an L-shape with one open end often balances capacity and access better than a fully enclosed booth.
| Configuration | Best Suited For | Typical Planning Footprint | Approximate Seating | Advantages | Planning Considerations |
|---|---|---|---|---|---|
| Straight | Narrow dining areas, kitchen walls, and simple breakfast nooks | About 5–8 ft of wall length; allow roughly 30–36 in. from the wall to the table edge for the seat and table | Usually 2–4 people, depending on the usable seat length | Simple to place against a wall and generally makes efficient use of a narrow room | Check that the opposite chairs can be pulled out without blocking a walkway or doorway |
| L-shaped | Corners, open-plan kitchens, and family dining areas | Commonly around 5–7 ft along each wall; confirm both wall runs and the table’s corner clearance | Often 4–6 people, depending on the length of each side | Uses a corner effectively and creates a defined dining zone | Allow enough room at the inside corner for comfortable seating; a round or pedestal table can make access easier |
| U-shaped | Larger breakfast rooms, family spaces, and dining areas used for group meals | Often needs approximately 7–9 ft in both directions, plus space for a table within the seating area | Typically 6–8 people, depending on the layout and table size | Offers seating on three sides and can make conversation easier in a group | Requires more floor area; plan a clear entry point so diners can get in and out comfortably |
| Curved or semicircular | Feature dining areas, bay windows, and layouts centered on a round table | Varies by curve; measure the full arc and allow room for the table and access around the open side | Usually 4–6 people, depending on the curve and table diameter | Creates a soft visual shape and works naturally with round tables | Curved seating may need custom measurements; match the table shape to the seat to avoid awkward gaps |
| Parallel or face-to-face | Long, narrow rooms and dining areas where two opposing seats are preferred | Allow roughly 30–36 in. for each seat-and-table side, plus a clear aisle where needed | Often 4–8 people, depending on the length of the benches | Provides seating on both sides of the table and suits a rectangular dining layout | Check the total room width, including the table, seat depth, and space needed to enter or exit |
Planning note: Seating figures and footprints are estimates, not fixed standards. As a starting point, allow about 24–30 in. of seat length per person, then confirm the dimensions against the table, room layout, and required walkways.
A banquette’s frame and upholstery face different kinds of wear. Solid hardwood or well-braced plywood can provide a stable base, but inspect the joints and supports rather than judging by appearance alone. Sit near the edge and shift your weight; movement or creaking may signal weak construction.
Feel the edge. Metal frames can be sturdy, though exposed corners may feel less comfortable in a tight dining nook. Ask how the seat is supported and whether its parts can be repaired.
Upholstery choice depends on who uses the space and how often. Tightly woven performance fabric may handle spills and daily friction better than a delicate weave, while leather or coated materials can usually be wiped clean. Check the care instructions before choosing: “easy to clean” does not always mean stain-proof.
Small details matter. Look at seams, piping, and cushion closures, since these areas often show wear first. Firm foam may keep its shape longer, but an overly firm seat can make long meals uncomfortable.
One trade-off is easy to miss: textured fabric can hide crumbs, yet may take more effort to vacuum. Consider asking for a sample and testing it with your usual cleaning routine before ordering.
Begin with the room, not the catalog. Measure the wall, then mark the proposed seat footprint with painter’s tape. A seat depth of about 18 to 20 inches and a height near 17 to 19 inches suit many dining setups, but check the table height and actual product dimensions. Leave enough space for people to slide in and for nearby doors or drawers to open. Measure twice.
During installation, locate wall studs before fixing a built-in bench, and use suitable supports for its weight and expected use. Check the floor for uneven spots; a small level can reveal a wobble that is easy to miss by eye. Keep access to outlets, vents, and plumbing clear. It is tempting to squeeze in one more seat, but that can make everyday entry awkward. Leave room to move.
Choose upholstery with your cleaning habits in mind. Crumbs collect along seams, while spills can soak into untreated fabric quickly. Vacuum the seat and creases regularly, and blot fresh spills rather than rubbing them deeper. Use cleaning products only when the fabric care instructions allow them. Wood or other hard surfaces usually need a soft cloth and prompt drying. I would leave a little extra clearance around the table; measurements look neat on paper, yet real rooms are not always square.