
Skip to content

10 Tips for Buying Outdoor Xmas Lanterns?

Choosing Outdoor Xmas Lanterns is more than selecting a festive shape or glittering finish. It involves safety, weather resistance, energy use, brightness, and seasonal storage. Grand View Research valued the global decorative lighting market at approximately USD 39.6 billion in 2022. Its report also forecasts a 4.6% compound annual growth rate from 2023 to 2030. These figures cover decorative lighting broadly, not Christmas lanterns alone. Still, they reveal stronger demand for attractive, flexible illumination.

Practical buying decisions matter more than impressive packaging. Check the IP rating before placing lanterns on a porch, balcony, or garden path. An IP44 rating may handle splashes, while exposed locations often need stronger protection. Look for warm light between 2,200K and 2,700K. It creates a softer glow around wreaths, wooden doors, and snowy steps. LED bulbs usually reduce energy use and heat. The U.S. Department of Energy states that LEDs use at least 75% less energy than incandescent lighting. Battery timers can simplify daily use, but cold weather may shorten battery life. Solar models sound convenient. Shaded gardens may disagree.

Randall Whitehead, an architectural lighting designer, describes lighting as “the jewelry of architecture.” That idea fits Outdoor Xmas Lanterns, but decoration should never hide poor construction. Look for sealed switches, stable bases, replaceable batteries, and clear safety instructions. Then consider scale: a small lantern may disappear beside a wide entrance, while an oversized one can make a narrow path feel crowded. Some advice remains imperfect. Product ratings can be vague, and real winter conditions differ from laboratory tests. These ten tips will help readers compare claims carefully, inspect physical details, and choose lanterns that remain beautiful after the first holiday evening.
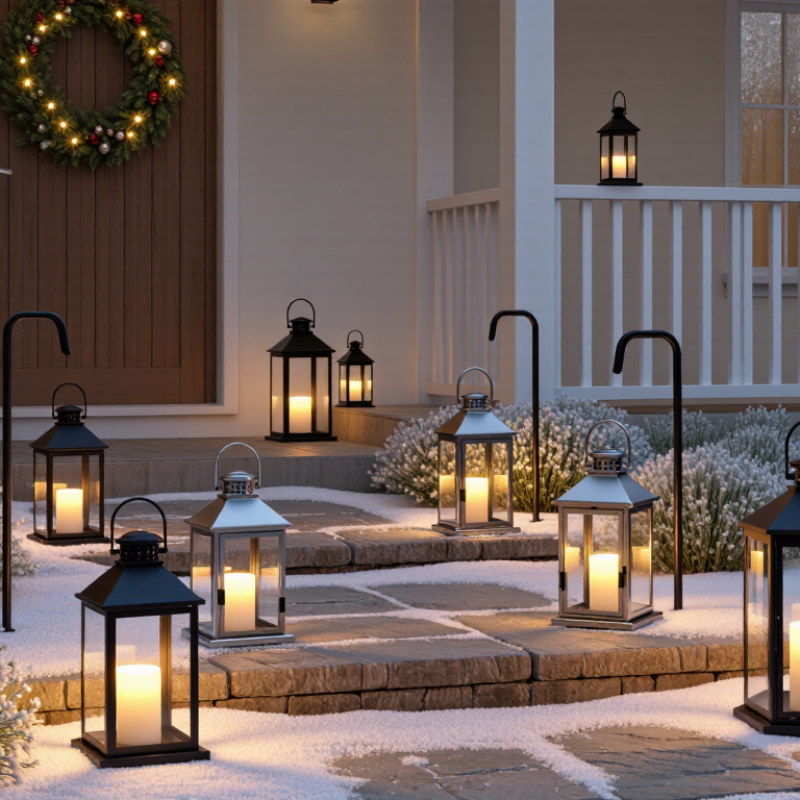
10 Tips for Buying Outdoor Xmas Lanterns?

Understanding Outdoor Christmas Lantern Types and Uses

Outdoor Christmas lanterns differ in power source, light quality, and placement. Solar lanterns suit sunny steps or garden paths, but short winter days can limit their evening runtime. Battery-powered models are easier to move; keep spare batteries nearby when hosting. Plug-in lanterns work well beside a sheltered porch outlet, provided their labels specifically allow outdoor use. A warm-white LED creates a softer window glow, while clear LEDs make patterned cutouts stand out. Small details matter.

Check the enclosure’s stated weather rating and follow its outdoor-use instructions. An IP code describes protection against dust and water, but it does not mean every lantern can withstand heavy rain or freezing conditions. Place lanterns where water cannot pool, and keep cords away from walkways and doorways. For exposed areas, choose fixtures explicitly rated for those conditions. Don’t guess from appearance.

Energy use is worth comparing, especially if lights stay on for hours. The U.S. Department of Energy’s Energy Saver guidance says LEDs use up to 75% less energy and can last up to 25 times longer than incandescent lighting. That comparison concerns LED technology generally, not a guarantee for any individual lantern. Check the product’s stated battery life, charging needs, and replacement parts. A solar lantern may look convenient, yet a shaded porch can make it disappointing.

Choosing the Right Size, Style, and Light Color

For a welcoming porch, match lantern size to the space around it. A pair of medium lanterns can frame a doorway, while one oversized piece may crowd a narrow step. Check the lantern’s height against the door handle and nearby railings; leave a clear walking path. Small details matter. A tiny lantern can disappear beside a wide entrance, and I’d avoid assuming bigger always looks better. For exposed locations, check the product’s outdoor-use rating and follow its installation instructions.

Style should suit the house, not just the holiday display. Metal frames feel crisp; wood-look finishes and frosted panels feel softer. Light color changes the effect, too. Warm white, around 2700–3000 kelvin, gives greenery and red decorations a gentle glow. Cooler white can make snow details look sharper, but may feel stark beside warm indoor lighting. One useful energy check: the U.S. Department of Energy’s Energy Saver guidance says LEDs use at least 75% less energy and last up to 25 times longer than incandescent lighting. Choose LED lanterns when available, then compare brightness and color rather than wattage alone. Test the light after dusk. Colors can surprise you.

Checking Weather Resistance, Materials, and Safety Features

10 Tips for Buying Outdoor Xmas Lanterns

Outdoor lanterns face rain, frost, wind, and sudden temperature changes.

Tip 1: Check the weather-resistance rating before admiring the design. A suitable outdoor rating matters more than decorative glass.

Tip 2: Inspect the seals around the lid, switch, and cable entry. Tiny gaps can invite moisture.

Tip 3: Choose materials carefully. Powder-coated metal resists surface rust, while thick outdoor plastic stays lighter and safer around children.

Tip 4: Avoid brittle panels that crack in freezing weather. They often look attractive in the shop.

Tip 5: Look for stable bases or hanging hooks. A lantern should not wobble when wind moves nearby branches.

Tip 6: Examine the wiring and plug for outdoor suitability. Do not rely on an indoor extension cord.

Tip 7: Prefer enclosed bulbs and protected battery compartments. Water and loose connections create avoidable hazards.

Tip 8: Check for recognized safety testing marks and clear operating instructions. Missing information deserves caution.

Tip 9: Consider heat. LED lighting usually produces less heat, but ventilation still matters.

Tip 10: Test the timer, switch, and brightness controls before installation. Small faults become frustrating after dark.

I once bought a lantern with a beautiful thin finish, but the coating dulled after one wet season. That experience changed my priorities. Appearance still matters, though durability should lead. Place lanterns away from puddles, falling snow, and crowded walkways. Keep cables secured, not stretched across paths. Recheck the lantern after severe weather. Even a well-rated product can suffer damage. My judgment is not perfect, and product labels can be confusing, so I compare the instructions with the actual construction.

Comparing Power Sources, Brightness, and Energy Efficiency

Buying Outdoor Xmas Lanterns: Comparing Power Sources, Brightness, and Energy Efficiency

Buying outdoor Christmas lanterns gets easier when the power source matches your location. I have tested battery, solar, and plug-in lanterns around porches, paths, and unheated balconies. Battery models install quickly, but cold nights can shorten runtime. Keep spare batteries in a dry drawer. Small detail, big difference. Solar lanterns need direct daylight, not just a bright window. Shade from roof eaves may leave them dim by evening. Plug-in lanterns usually provide steadier brightness, although outdoor outlets and weatherproof connections require careful checking.

Brightness should be judged by lumens, not by bulb count alone. For a table lantern, 50 to 150 lumens often feels comfortable. Path lighting may need more, especially beside steps. Too much glare hides uneven ground. Warm light near 2,200 to 3,000 kelvins creates a softer holiday effect. I once chose a brighter set and disliked it; the patio looked more like a parking area. My first estimate was wrong.

Energy efficiency depends on the whole setup. LEDs generally use less electricity and stay cooler than older bulb types. Check the stated wattage, expected runtime, and timer settings together. A six-hour timer can prevent an attractive display from burning all night. For solar units, compare battery capacity and charging time, not promises about all-night use. Look for clear weather-resistance information and inspect cables before installation. I would also buy one lantern first. Test it for several evenings. Real shadows, wind, and frost reveal weaknesses that packaging cannot.

10 Tips for Buying Outdoor Xmas Lanterns? - Comparing Power Sources, Brightness, and Energy Efficiency
# Buying Tip Power Source / Check Brightness Guidance Energy or Runtime Example
1 Match the power source to the location. Choose solar where the panel can receive direct daylight; choose mains power for dependable, regular lighting near an outdoor outlet. Solar: no grid electricity while operating. Mains: check the cable, plug, and outlet are rated for outdoor use. Solar output can fall after cloudy days or during short winter days; check the maker’s stated lumen output and runtime. Solar uses 0 kWh of grid electricity during operation. Actual charging and runtime depend on sunlight, battery condition, and temperature.
2 Compare lumens, not just “bright” claims. Lumens measure the total visible light emitted; beam shape and the lantern’s shade also affect perceived brightness. Look for a lumen figure in the product specifications. If none is provided, brightness comparisons are difficult. About 20–100 lm can suit a decorative glow; roughly 100–300 lm may provide stronger accent lighting. These are broad examples, not fixed standards. Higher brightness often requires more power or a larger battery, so compare lumens alongside watts and runtime.
3 Check lumens per watt for powered lights. This helps compare how much light different electrical options produce for the power they use. For a listed output and input wattage, divide lumens by watts. Use comparable products and note that shades can reduce light reaching the surroundings. Example: a 160 lm lantern drawing 2 W produces 80 lm/W. LED efficiency varies by design and operating conditions; treat the calculated figure as a comparison aid, not a guarantee of outdoor performance.
4 Estimate seasonal electricity use. Multiply the lantern’s watts by the hours used, then divide by 1,000 to get kilowatt-hours (kWh). Example assumes 6 hours per night for 30 nights (180 hours total) and uses the lamp’s stated input power. Brightness is not included in the energy calculation; compare it separately using lumens. A 2 W LED uses about 0.36 kWh; a 5 W LED uses about 0.90 kWh over 180 hours. These are calculated examples.
5 For battery models, compare stated runtime at the chosen brightness. Maximum runtime may refer to a dim setting rather than the brightest mode. Check whether cells are included, replaceable, or rechargeable, and whether the battery is user-replaceable. Ask for runtime at the specific lumen level or lighting mode you expect to use. Runtime varies with battery capacity, temperature, brightness, and battery age; there is no single reliable runtime for all battery lanterns.
6 Check solar-panel placement and winter performance. A panel in shade, behind glass, or facing away from the sun may charge less effectively. Look for the charging time and operating time specified by the manufacturer, and whether the panel can be positioned separately from the lantern. Confirm that the stated brightness is available for a useful portion of the night, not only immediately after charging. Cloud cover, shorter daylight hours, panel orientation, dirt, and cold weather can reduce available charge and runtime.
7 Use a timer or automatic shutoff. Shortening daily operating time reduces energy use and can extend battery runtime. Check for a built-in timer, dusk-to-dawn sensor, or a compatible outdoor-rated timer for mains-powered lights. Select a setting that provides enough light for the intended decorative or pathway use. Reducing use from 6 to 4 hours nightly cuts operating time, and therefore operating energy at the same wattage, by one-third.
8 Choose a warm or cool color to suit the setting. Color temperature affects appearance, but it does not by itself show how energy-efficient a lantern is. If listed, color temperature is measured in kelvins (K). Lower values generally look warmer; higher values generally look cooler. Around 2,700–3,000 K is commonly described as warm white; check product specifications because decorative colors may not use a white-light rating. Compare watts and lumens for energy and output; do not use color temperature as a substitute for either measure.
9 Verify the outdoor protection rating. A suitable rating helps the lantern withstand the conditions where it will be placed. IP44 indicates protection against solid objects 1 mm and larger and water splashing from any direction. IP65 is dust-tight and protected against water jets. The IP rating describes enclosure protection, not brightness or energy efficiency. Check the rating for the complete lantern and any separate plug, adapter, or solar panel; follow the product’s placement instructions.
10 Consider repairability and battery replacement. A replaceable battery or standard lamp can make a lantern easier to maintain than a sealed unit. Check battery type, replacement availability, charging method, and whether the light source or battery is sealed inside. Confirm that brightness and lighting modes meet your needs throughout the expected service life. Replaceable components can help avoid discarding the entire lantern when a battery wears out; battery lifespan depends on use and care.
Note: Brightness, wattage, runtime, and charging performance vary by product and conditions. Energy figures above are illustrative calculations based on the stated assumptions, not specifications for a particular lantern.

Planning Placement, Maintenance, and Seasonal Storage

Outdoor Xmas lanterns look charming, but placement determines their real impact. Before buying, measure the porch, steps, or garden path. I leave enough space for doors, walking routes, and dripping rainwater. Keep cords away from puddles and sharp edges. Test the view at night. Lanterns should guide attention, not create glare. For porches, warm light usually feels more welcoming than harsh white light. I once placed three lanterns too close together. That mistake made the entrance look crowded.

Choose weather-resistant lanterns designed for outdoor use, then inspect them after storms. Wipe dust and pollen away with a soft, slightly damp cloth. For battery models, check the compartment for rust or moisture. Moisture inside is a warning. Replace cracked covers, loose wires, or cloudy lenses before using the lantern again. Do not assume a sealed design stays perfect forever. A small inspection can prevent uneven lighting and premature damage. Use a timer when possible. It prevents unnecessary overnight operation.

Seasonal storage deserves equal attention. Remove batteries before storing lanterns, and dry every part completely. Wrap cords loosely instead of bending them sharply. I prefer a ventilated plastic box with a cloth layer between lanterns. Label each piece by location, such as “front steps” or “patio rail.” Store lanterns somewhere cool and dry, away from fertilizer, tools, and direct sunlight. Avoid stacking heavy decorations on top. Last winter, one lantern developed a cloudy lens after I stored it in a damp shed. Next season, I will check the storage area first. Would I use that shed again? Maybe not.

Scroll To Top